Hat Block Gallery
The Hat Block Gallery is a reference and resource of historical and contemporary hat block forms and styles, providing inspiration for professional and student milliners and encourage current and future hat block makers.
Hat Block Gallery


The Hat Block Gallery contain photos of hat blocks listed or sold on sites around the internet. The titles or names associated with the blocks are database references only and not intended to represent hat block style numbers. Hat Block Resource makes no claims or representations regarding selling prices and values. Please visit my website blog for additional information regarding hats and hat blocks.
Etsy Hat Block Search
Ebay Hat Block Search
Repairing Hat Blocks
Here are a few suggestions for repairing damaged blocks. Maybe you are considering a block on Ebay or other source that has obvious damage and trying to decide if it is worth your investment. Can you repair it or will you need to find a professional woodworker to do the job?
I made these repairs using Elmers Carpenters Glue, several grades of sandpaper, a selection of wood files and SculpWood, a moldable epoxy putty recommended by a local woodcraft store. A package of SculpWood is approximately $35.00. It contains two puttys, one white and one tan which you will mix or kneed equal parts until thoroughly mixed using latex or nitrile gloves, then molded into the cavity or shape required. SculpWood is easy to work with and remains pliable for 15 minutes or more. Do not mix more than you will be using in a short time. SculptWood cures in 4 hours however I let it cure for 24 hours or more. Then sand or file to restore the block shape.
Block 927:
Damage included a one inch chip out of the left side of the pinch at the front of the crown and a 2 to 3 inch crack further along the left side or the recess ridge.


I decided to drive two bank pins in to the block to give attachment support for the putty filling on the vulnerable recessed edge of the crown. This block is made of high quality dense wood so I carefully tapped the bank pins into place with a small hammer. If I had determined the wood of this block was of insufficient strength I would have used a small drill bit and drilled two holes for the pins first and then glued them into place so as not to risk splitting the wood.
The cavity was filled with epoxy putty and left to cure for 24 hours.


Then sanded as needed to restore the original shape of the ridge on the crown.


Block #506
Damage included splits in front and back and a previous repair which had come loose.
Repairs included pulling out the earlier repair wedge, roughing it up with a file, slicking it with glue and returning it to its original positioning.


Then the splits front and back were filled with SculpWood epoxy putty, pushing as much epoxy material as possible into the crevasses with a toothpick and left to cure for 24 hours.


The block was then filed and sanded to the original contours of the block.


Block #631
Damage included large and small chips out of the edge of the brim.


Repair required inserting 3 strong bank pins in the large chip area to support the epoxy putty patch.


Careful sanding and filing to restore the top brim edge and the string line on the underside.


Vintage Hat Repair & Restoration
I recently completed repairs and restoration on two charming vintage hats. While the hats are indeed precious, the repairs were needed to restore the hats to functional and wearable condition not museum conservation condition. These hats are used for fashion shows by the Seattle Children’s Hospital Charitable Organization and are part of their historic and vintage collection.
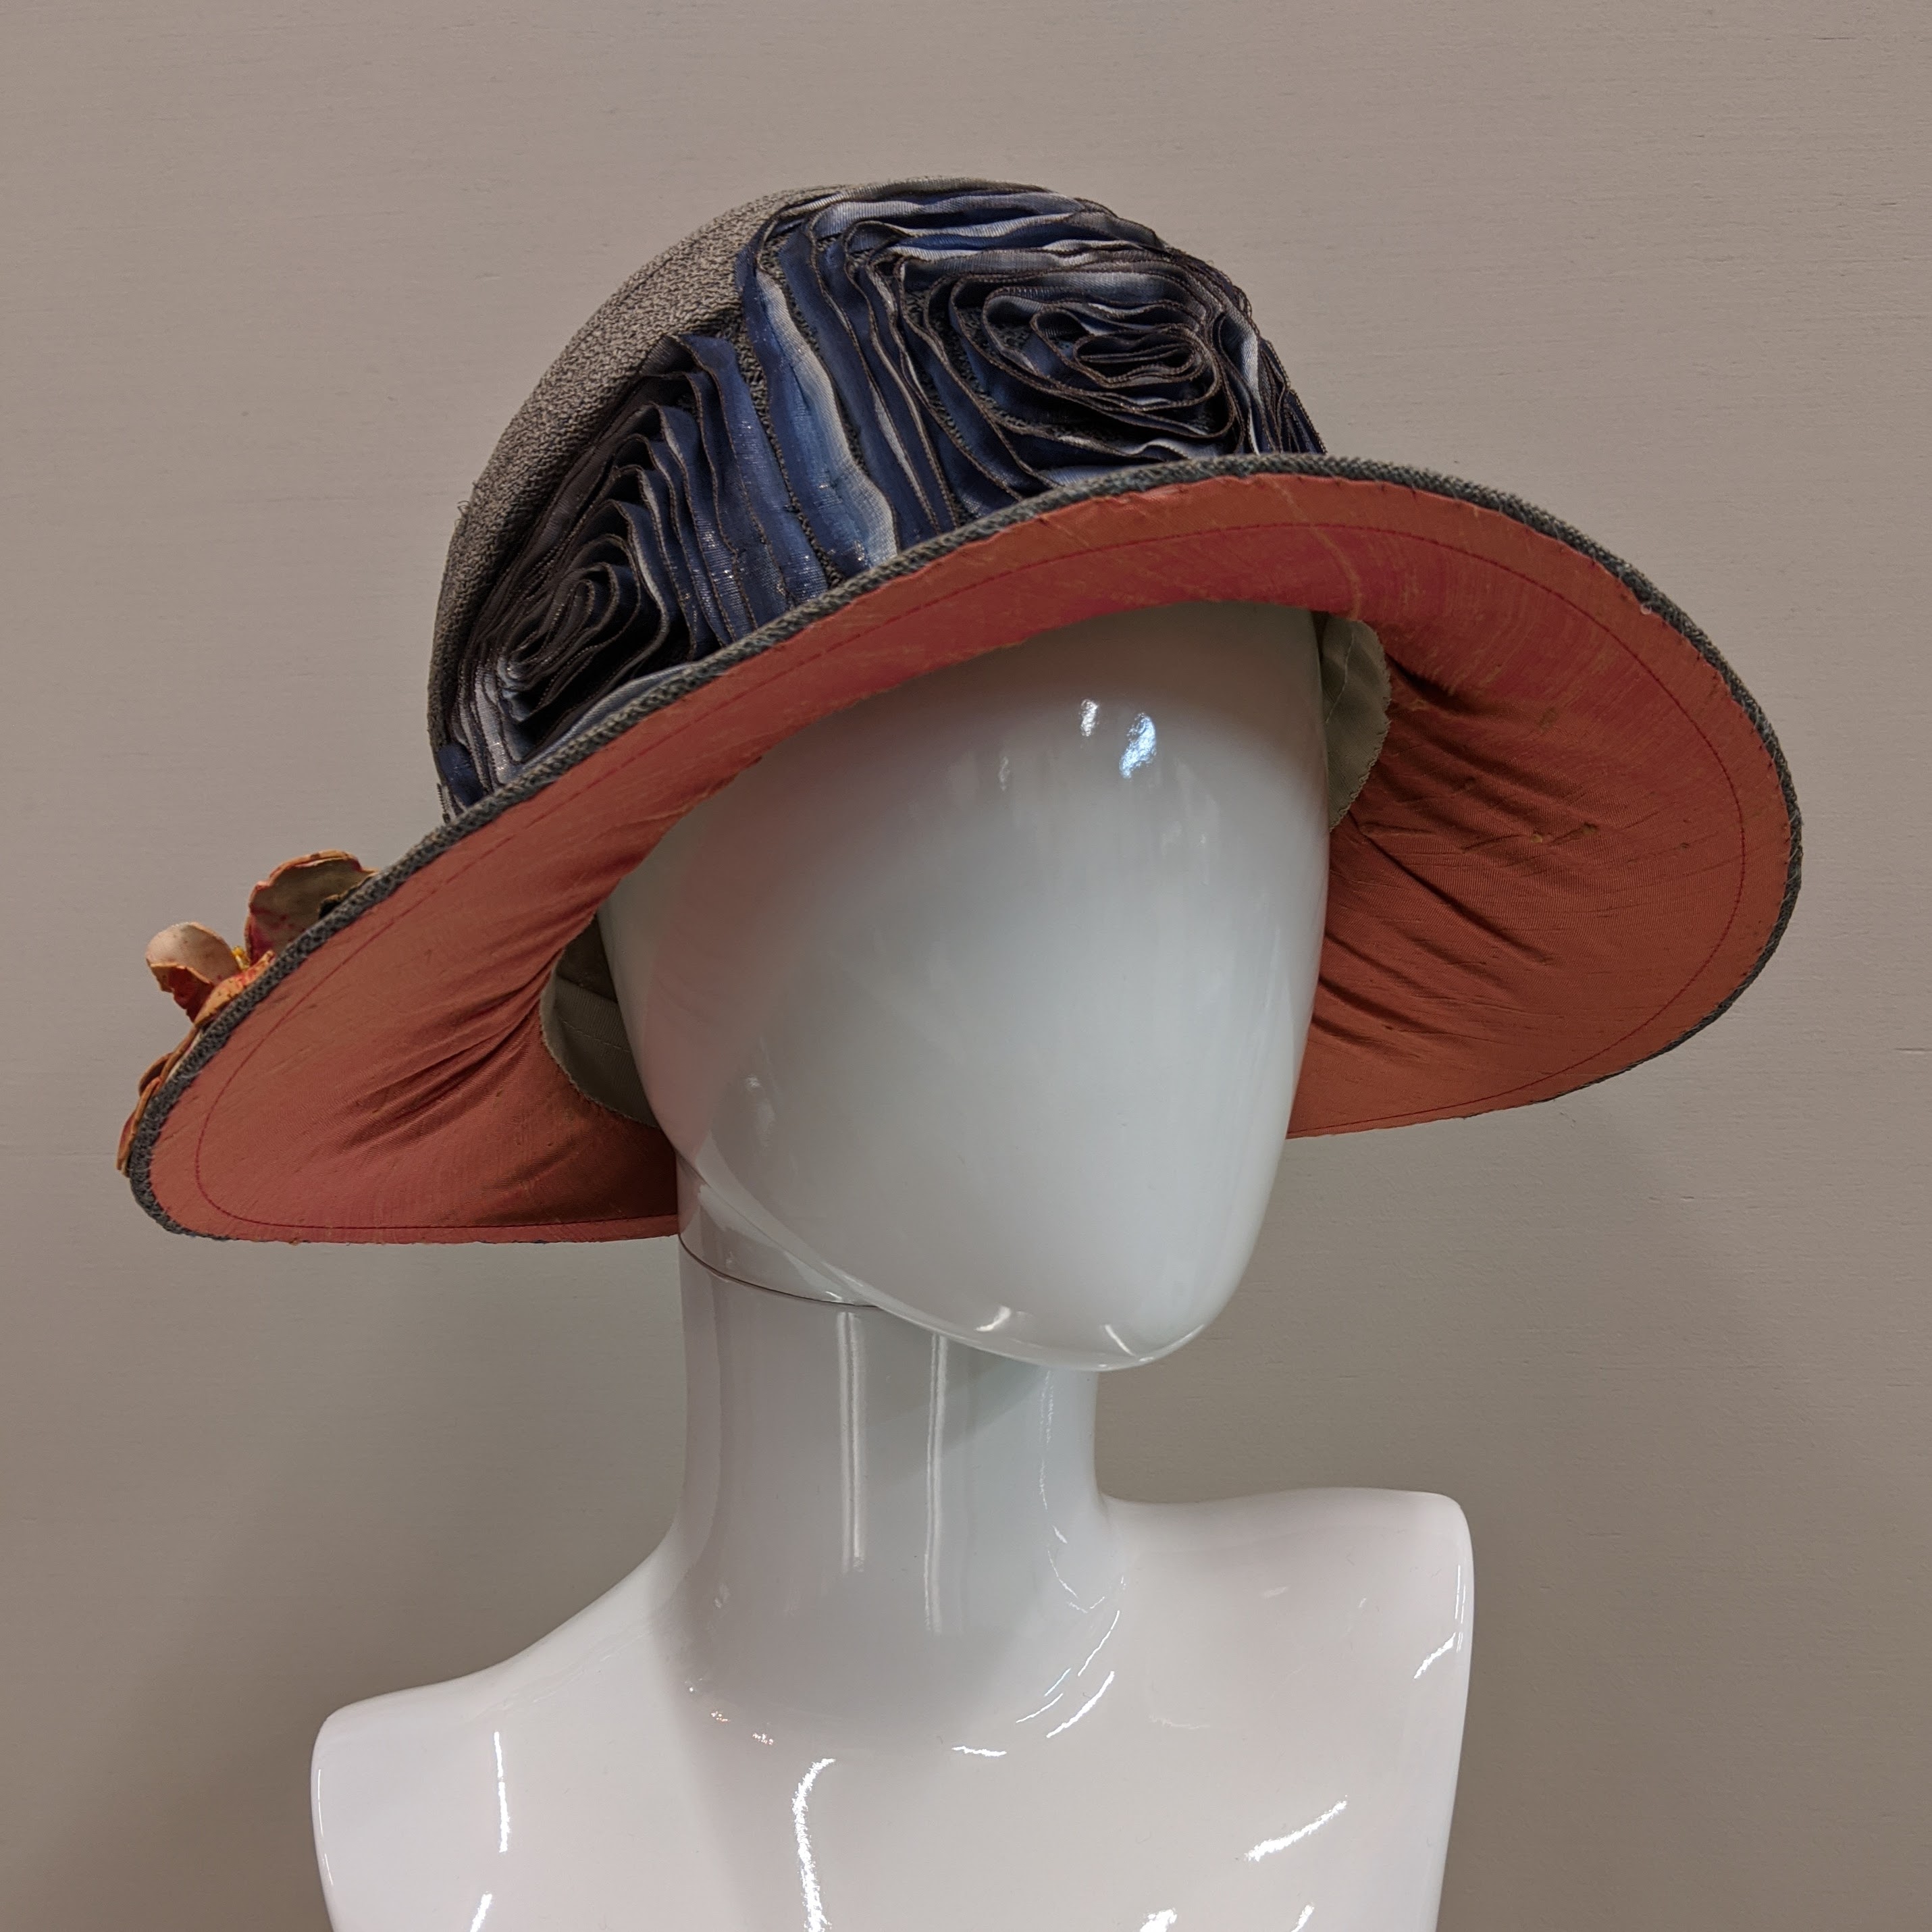
Straw Braid Cloche – #1920 E – Pale blue/grey straw braid cloche with pink silk underbrim, ribbon work details and hand painted cork millinery flower.
The original pink silk underbrim was badly deteriorated. I cut a five inch wide bias of dupioni silk and sewed a narrow casing at edge of the bias. A nylon brim wire was inserted into the casing and hand stitched to the existing straw braid brim to float the new underbrim and which would additionally support the existing straw braid brim for the future. Then the bias was gathered and pleated down into the headsize of the cloche crown. An adjustable headsize ribbon sewn in to provide for variable headsizes.


The lining with its lovely details of the original Seattle milliner was in serviceable condition and reused for historic interest. The delicate hand painted cork millinery flower was repaired with a millinery glue to secure cracked and broken petals. I used permanent dye to stain and mask the white cotton backing on a few petals where the thin cork was broken and had flaked away.
Ebay Block


A very nice shape with deep circular recess crevasse in the top. Soft folds from the front to the sides. This is a “European style hat block”.
Revising and Altering Hat Blocks
This summer I purchased a large collection of hat blocks from a factory in Pennsylvania. In the collection was a number of hat blocks that I determined would more useful if redesigned or revised, so in early December 2009 I traveled to Seattle to work with Brian and Sam, two expert woodworkers, to alter 22 hat blocks.
Early in my career I would never have considered altering a hat block. I considered it sacrilegious, but over the years I’ve become more pragmatic. If a block isn’t useful it is either changed or passed on to someone who does consider it useful.


Brian and Sam are boatwrights and, while expert woodworkers were unfamiliar with hat blocks and their uses. I blocked several felt hats to show the functions of hat blocks. Then we set to discussion of the new design lines and shape changes I wanted. Brian and Sam were very enthusiastic and quick on the concepts and we rapidly developed a collaborative working relationship. I taped or drew the new brim profiles and string line placements directly on the blocks, and as Brian and Sam carved, gouged, sawed and sanded I was available to make on the spot decisions to refine changes to the blocks.
Nine of the blocks I intended to change were deep bowl-shaped bretons and not useful for my needs in designing for a contemporary millinery market.


Below are 3 photos of Block 265 in its original form.


Block 265 was a symmetrical bowl-shaped breton which I decided to change by keeping the full height at the front of the hat block and carving a new design line with an angled shorter profile and a narrow brim at the back of the hat.


The 4th photo is upside down to give better understanding to the new asymmetrical changes to the block.
The same changes on Block 2205


and the changes to Block 2205


Block 2658


The changes to Block 2658 are more dramatic and make it much more versatile. I decided have Sam cut away the bowl curve of the brim, changing the profile to an angled straight plane, and tapering down and narrowing the back of the brim. This brim will now create both an upturned brim as it was originally designed for as well as a down turned brim.


